I've always chosen halogen lamps for my coin photography because of their small size and white light. It seems to me that I get good color and detail with them, so I've never had any reason to change. But as you probably know, everybody seems to have a favorite lamp or bulb that works well for them. All this made me ask the question: Is there really any difference between the various lights when photographing coins? That's the question that I've set out to answer. My gut feeling at the beginning of the test was that there would be very little difference between the various lights when white balance is taken into account. Gut feelings don't cut it, so I went out and acquired as many bulbs as I could find and all those that are popular with the photographers. The list includes:
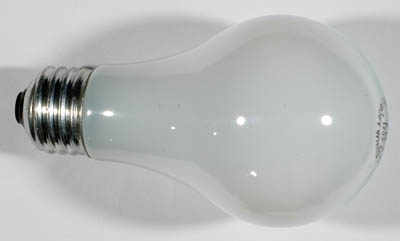
75W Soft White bulb
75W Reveal bulb

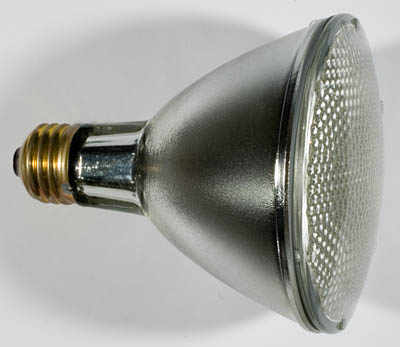
75W PAR30 halogen lamp
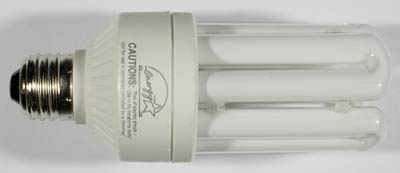
20W fluorescent bulb
13W Ott light
20W halogen desk lamp
300W halogen lamp

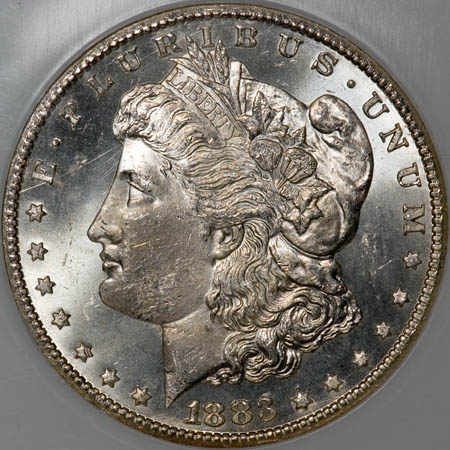
With the lights that come as a bare bulb, I used a standard clamp-on gooseneck desk lamp. I removed the hood from the lamp so that the bulbs could get close to the lens when shooting. I only used one lamp for the images because I didn't want to have to buy multiple copies of each type of bulb. I decided to take pictures of a Morgan dollar and a red-brown Indian cent. The Morgan has nice detail and luster and the cent has nice color for the test. So now I just have to take some pictures and see what I can figure out. It turned out to be not as easy as I thought it would be.
The first issue was to get a good white balance setting on the camera. I use the white balance preset function on my Nikon D70 camera. It's the setting by which the camera measures the white balance of the lighting and sets the camera accordingly. Many cameras have a similar setting. It's a good feature to have as the white balance of a particular bulb or light may not fit into one of the usual settings (tungsten, cloudy, fluorescent, etc.).
White balance can also be corrected for by software such as Photoshop. Programs commonly have a function by which you click on a white area of the photo and the program corrects the color. I shoot images in the RAW format. These images are stored without adjustment by the camera, functionally the "raw" data off of the detector. The white balance data is sent over separately and is shown in the editor as color temperature and tint. These are user adjustable at the time of image editing. I will use this data later to put numbers to the white balance of the various bulbs. I don't know how accurate the numbers are, but I think that they are close.
So, I start shooting photos and find out that my white balance measurement isn't quite as good as I thought it would be. I found this to be especially true with the fluorescent and Ott lamps. The white balance measurements varied all over the place with these two lights. My first thought was that there was something about the spectra of those lamps that would prevent the camera from getting an accurate white balance measurement. My second thought was that maybe the white sheet of paper I was using to measure the white balance isn't ideal and that I should use an 18% gray card to measure the white balance. I then bought a couple small gray cards made for this purpose (a couple bucks each at B and H photo on the web).
Now I had another aspect to the test. Is the gray card better than the white card for measuring the white balance? I decided that I would take multiple white balance measurements with my 300W halogen lamp and see what the difference was. I would first measure the white balance with the white paper/gray card. I would then take a picture of the paper or card. This would give me the color temperature and tint of each measurement and also give me a way to see if the white balance was accurate by seeing if the pictures were truly white or gray.
With 10 repetitions of each I found that the camera was extremely consistent with the white balance measurement with either the gray card or the white paper. The gray card measured 3100K with a tint of -6 (negative = more red in light, positive = more green/blue) on every repetition. The white paper measured 3150K and a tint of -5 on every repetition. The light bulbs supposedly have a color temperature of 3200K, so both measurements seem reasonably accurate.
The second part of the white balance test was to take the pictures done at the time of the white balance measurement and see if the card/paper are truly white/gray. I acquired the average intensity of the red, green and blue out of each image out in Photoshop. The intensity of each color should be the same if they are truly white or gray. I equalized the intensity between the white paper and gray card. The results are shown below.
| Measurement | Red | Green | Blue |
| White paper | 98.75 | 98.71 | 98.94 |
| Gray card | 98.02 | 98.01 | 98.65 |
When you look at the numbers, both methods did a good job of taking a white balance. The camera did a good job of making both "white." The slightly different measured color temperature and tint of the white paper suggests to me that the white paper isn't quite white and has a subtle blue tinge to it. That is probably done to make the paper look "whiter" to the eye. "Cooler" whites (higher color temperature) look whiter than "warmer" whites (lower color temperatures). The bottom line is that you can get a decent white balance with a gray card or a white piece of paper, although I'd like to think that the gray card may be a bit more accurate. I'll stick to the gray card for all measurements after this.
At this point, I still haven't figured out why I was getting inconsistent results with the white balance on both the fluorescent light and the Ott light. I then decided that I would do the same white balance test with the Ott light. I took four measurements and pictures with each card. I got pretty consistent results on each at about 5200K and a tint of about +26. So, I figured that would take a picture of the coin and see what happens. I still got a strong green tinge.
I turned off the light and went back a couple minutes later and re-measured the white balance and now it measured completely different. I started to form a new theory that the white balance may not be stable until the light warms up. This would appear to be less of a problem with a really hot light such as a halogen lamp. I would expect a hot lamp to warm up faster and reach a stable color temperature quickly. The next step was to measure the color temperature and tint over time with both the fluorescent and Ott lights.
Ott Lamp:
| Time (m) | Color temperature | Tint |
| 0 | 5200 | 18 |
| 0.5 | 5250 | 23 |
| 1 | 5250 | 25 |
| 2 | 5300 | 27 |
| 5 | 5350 | 30 |
| 10 | 5450 | 36 |
| 14 | 5450 | 36 |
| 17 | 5500 | 36 |
| 22 | 5500 | 37 |
| 28 | 5500 | 36 |
| 40 | 5500 | 36 |
Fluorescent Lamp:
| Time (m) | Color Temperature | Tint |
| 0 | 2750 | 1 |
| 0.5 | 2750 | 0 |
| 1 | 2750 | 2 |
| 3 | 2750 | 4 |
| 7 | 2800 | 6 |
| 13 | 2900 | 7 |
| 20 | 2850 | 6 |
| 26 | 2850 | 6 |
| 31 | 2850 | 6 |
| 38 | 2850 | 6 |
As the above tables show, the color temperature and tint vary with time. Both appear to stabilize at about 10 minutes. Now I have an explanation for the color shift that I was seeing and the widely varying white balance measurements that I was getting. I think the take home point is that the cool running lights such as fluorescent and Ott lamps need some time to warm up. Otherwise, you'll be forever tweaking the color in your pictures.
Now that I've got this whole white balance problem figured out, I can do what I set out to do. Take pictures with each of the lights and see if there are any real differences in the resulting images.
GE Soft White 75 W bulb: The universally available common light bulb is cheap and easy to find. They have a color temperature of about 2750K with a slight shift towards red (-2 on the tint).

GE Reveal 75W bulb: Again, they are easy to find at your local variety store. In hand the bulb has a purplish look to it. They have a color temperature of about 2800K with a fairly strong shift towards red (-12 on the tint).
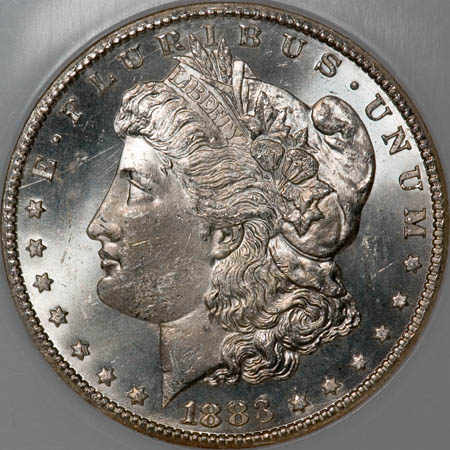

GE Edison 75W PAR30 halogen lamp: These are available at your local variety store for about $10. They fit in standard light sockets. One important point is that they come in spot and flood varieties. The spot versions have a narrow beam and don't work well at close quarters. I know this because I initially bought a spot version with an 11 degree beam width. The floods work better. I then got one with a 60 degree beam width and that one works nicely. The color temperature is about 2850K with a minimal shift toward red (-1 tint).

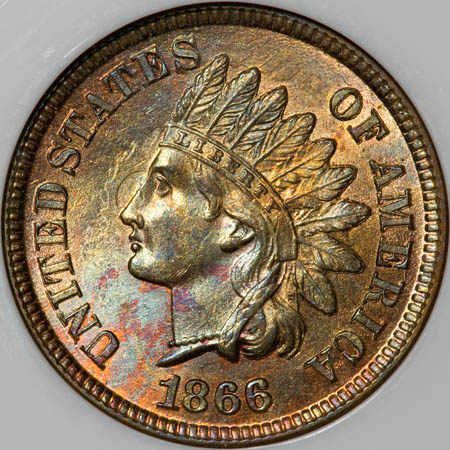
Ott Light 13W: I found this lamp at Jo-Ann fabrics. Ott lights are used by sewers and quilters. They are used for looking at fabric and color because of their similarity to sunlight. They are pricey and cost about $70 for a portable desk lamp, but can be found on sale occasionally. Ott lights have a color temperature of about 5500K and a strong shift toward green and blue and away from red (+36 on the tint).
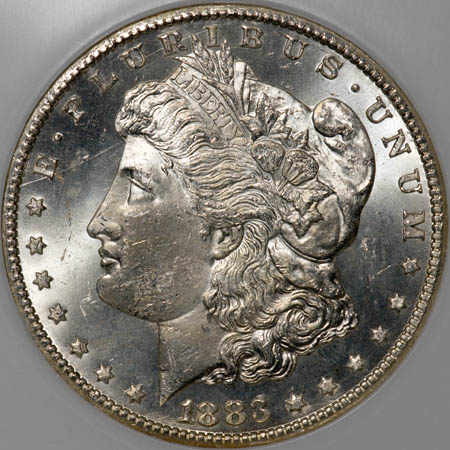

Luxlite 20W fluorescent bulb: These fluorescent lamps are made to fit into normal light sockets and produce light output similar to a standard 75W light bulb. Don't know how much they cost as I got one for free from the power company to promote energy savings. The color temperature is about 2850K with a slight push toward green/blue (+6 on the tint).


20W halogen desk lamp: This was my first lamp for coin photography. They have a small head on a gooseneck that allows the lamp to get in close to the camera. They cost about $15 each. The color temperature is about 2850K with a minimal shift toward red (-1 on the tint).

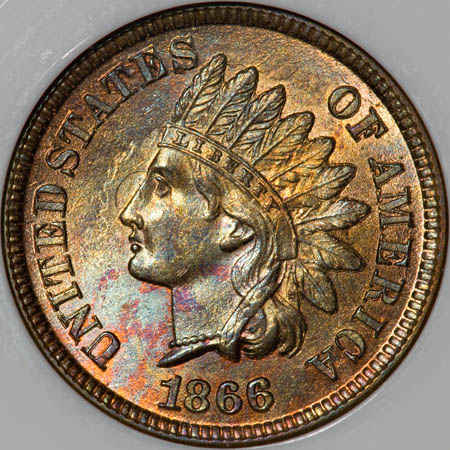
300W quartz halogen lamp: This is my standard photography light. They have a lot of power in a relatively small package. They produce a huge amount of heat and tend to melt things. They are expensive and cost about $400 for a pair. They have a color temperature of about 3100K with a slight red tint (-6 tint).
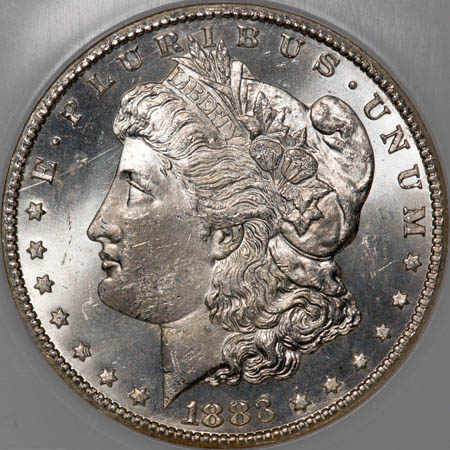

Image Interpretation: The differences between the images are very subtle. The lights that tend to have a reddish cast (halogen, PAR30, Soft-White, Reveal) tend to favor red a bit in the pictures. This is most evident on the Reveal bulb. The bulbs that favor green and blue (Ott and fluorescent lamps) tend to have a greenish (Ott) or yellowish (fluorescent) tinge. The yellow color cast with the fluorescent bulb is easily seen on the cent image. These color casts don't appear to be able to be easily corrected for by color temperature and tint alone, although the color cast with the Ott light and Reveal bulb are more subtle than the fluorescent lamp. The rest of the bulbs have a pretty minor color cast. I can imagine that the spectra of the various bulbs are complex enough that just two adjustments won't fully correct them.
There are some subtle differences in contrast between the images. This is mainly related to the form of the bulb. The more the bulb is a point source, the more contrast it will produce in the images. Most of the lights are similar on this aspect except for the Ott light. The Ott light is linear in form and tends to produce a softer, more diffuse light. This difference is easiest to see in the NGC surround, which is more smoothly lit than with the others. If the fluorescent bulb were placed sideways instead of vertically, it would produce a similar effect.
The Ott lamp also has the secondary difficulty of being more difficult to get close to the lens because of the housing it's in. This makes the luster cartwheel a bit less prominent and the lighting of the relief a bit less even. Small differences in the angle of the lighting make noticeable differences in the quality of lighting. Ott light does make a 25W Swirl Bulb that fits into a standard light socket and has the form of an incandescent bulb. If I were using Ott lights for coin imaging, this is the one that I would use.
There are also subtle differences in the sharpness of the images, but this difference is hard to see unless the images are much larger. I believe this difference to be predominantly related to the amount of light. The varying light outputs between the different bulbs will result in slower or faster shutter speed when shooting images. Faster shutter speed tends to produce sharper pictures. The table below shows the shutter speeds when using various bulbs while shooting the Morgan dollar images. The lights are all at roughly the same distance and position. As you can see, there is a wide variety to the shutter speeds achieved.
| Light | Shutter speed |
| 75W Reveal | 1/15 |
| 20W Fluorescent | 1/20 |
| 13W Ott light | 1/20 |
| 75W Soft White | 1/25 |
| 20W halogen | 1/50 |
| 75W PAR30 | 1/250 |
| 300W halogen | 1/640 |
Fluorescent lamps: A word of caution: Older fluorescent lamps flicker at the frequency of the electric current. This is typically about 60 Hz or 60 cycles/sec. This means that the color temperature and brightness of the lamp will vary 60 times/sec. This is not a problem as long as the shutter speed is slower than 1/60s, as the image will encompass at least one cycle completely. At shutter speeds faster than 1/60s, color/brightness shifts start to be a problem. The good news is that many of the newer fluorescent lights use an electronic ballast that use a much higher frequency and don't have these color shifts. I noticed the switch to high frequency ballasts with a new Ott light I purchased. The comes on much faster and the light doesn't have the typical hum seen with fluorescents. I confirmed the change with pictures taken with a fast shutter speed.

Old fluorescent lights flicker light intensity/white balance as seen by the color change from top to bottom of the above image.

New fluorescent light have an electronic ballast and don't show the flicker.

LED lightbulbs are also fine with no flicker.

New CFL lightbulbs are also fine for photos.
Take Home Points: I learned quite a bit from performing these tests, but not necessarily in the areas that I would have thought. White paper seems to work pretty well for most white balance measurements, but is probably a bit less accurate than a good gray card. Software can correct most white balance issues pretty well, but most lights do tend to leave a bit of a color cast in the resulting images. Software can correct these subtle color casts without too much effort. The autocolor tool in Photoshop seems to do a pretty good job of fixing color problems and made the above images almost indistinguishable.
The differences between the lights are really pretty minimal. You don't need to spend a lot of money on lighting. I got good results with a plain-old GE Soft-White light bulb. If your camera doesn't have a custom white balance setting, use a bulb that you can set the camera's white balance to. It will be less work to correct the white balance later if you get the white balance set closer at the time of the picture.
I got good results with the various bulbs by just using them bare. Just a bulb and a socket on a cheap gooseneck desklamp, no reflector or hood over them. Using the bare bulb has one strong benefit. It allows you to get the bulb in close to the camera without a reflector or hood to get in the way. You just need to be careful to not leave them on too long and melt things that are close by.
The concept of letting cool-running lights warm up was a unexpected tidbit gleaned from this test. The color temperature and tint of those lamps isn't stable until about 10 minutes have passed. Leave your Ott light or fluorescent bulb on for a few minutes prior to setting the white balance and shooting pictures and you shouldn't run into the widely varying white balance problems that I had.
Get as much light bulb wattage as you can, the faster shutter speeds will pay off in sharper pictures. This is mainly an issue at larger image sizes.
I think that my favorite bulb from this test, other than my own high-wattage halogen lamps, was the PAR30 bulb. They are bright, produce a nice white light and fit into standard light socket. They can be found at most variety stores and won't set you back much money. Just make sure that you get a flood version with a wide beam angle. The only bulb that I probably wouldn't use is the fluorescent as it seemed to have the strongest color cast of the bunch and didn't seem to have any added utility over a standard Soft White bulb.